pure css menu by Css3Menu.com
The Celestron Manual has directions for using the "two star" method of polar alignment. While this is not sufficient for long exposure astrophotograhic work, it is perfectly adequate for visual observing. The two star method will be accurate enough to allow using the setting circles on your C-8 to assist in finding objects.
Polar alignment is method used to insure the polar axis of your telescope is pointed approximately to the position of the north celestial pole. Good polar alignment will let your scope track objects for hours and allow using your setting circles.
Here is a technique used by Russell Whigham from Montgomery, Al.
I stumbled across a discovery the other night that might be of some interest to other Schmidt Cassegrain owners, especially those S-C's with detachable fork arms such as Celestron's C-11 and C-14. It may be a problem for fixed forks, I'm not sure.
The problem that I had struggled with was the coaxial alignment of the mechanical and optical axes. Misalignment causes improper polar alignment and field rotation. It's virtually impossible to verify that the declination circles are set correctly using the"eyeball" method. In the past, I've tried tricks like leveling the tube assembly and setting the declination circles to my latitude. This and other attempts just were not accurate enough.
During polar alignment, I noticed that while rotating the fork in R.A., that the star trails around the Celestial Pole were not concentric with the view in the eyepiece. It's not even a problem for visual work, especially for a "star hopper" like me, but it can be a real aggravation during guided astrophotography.
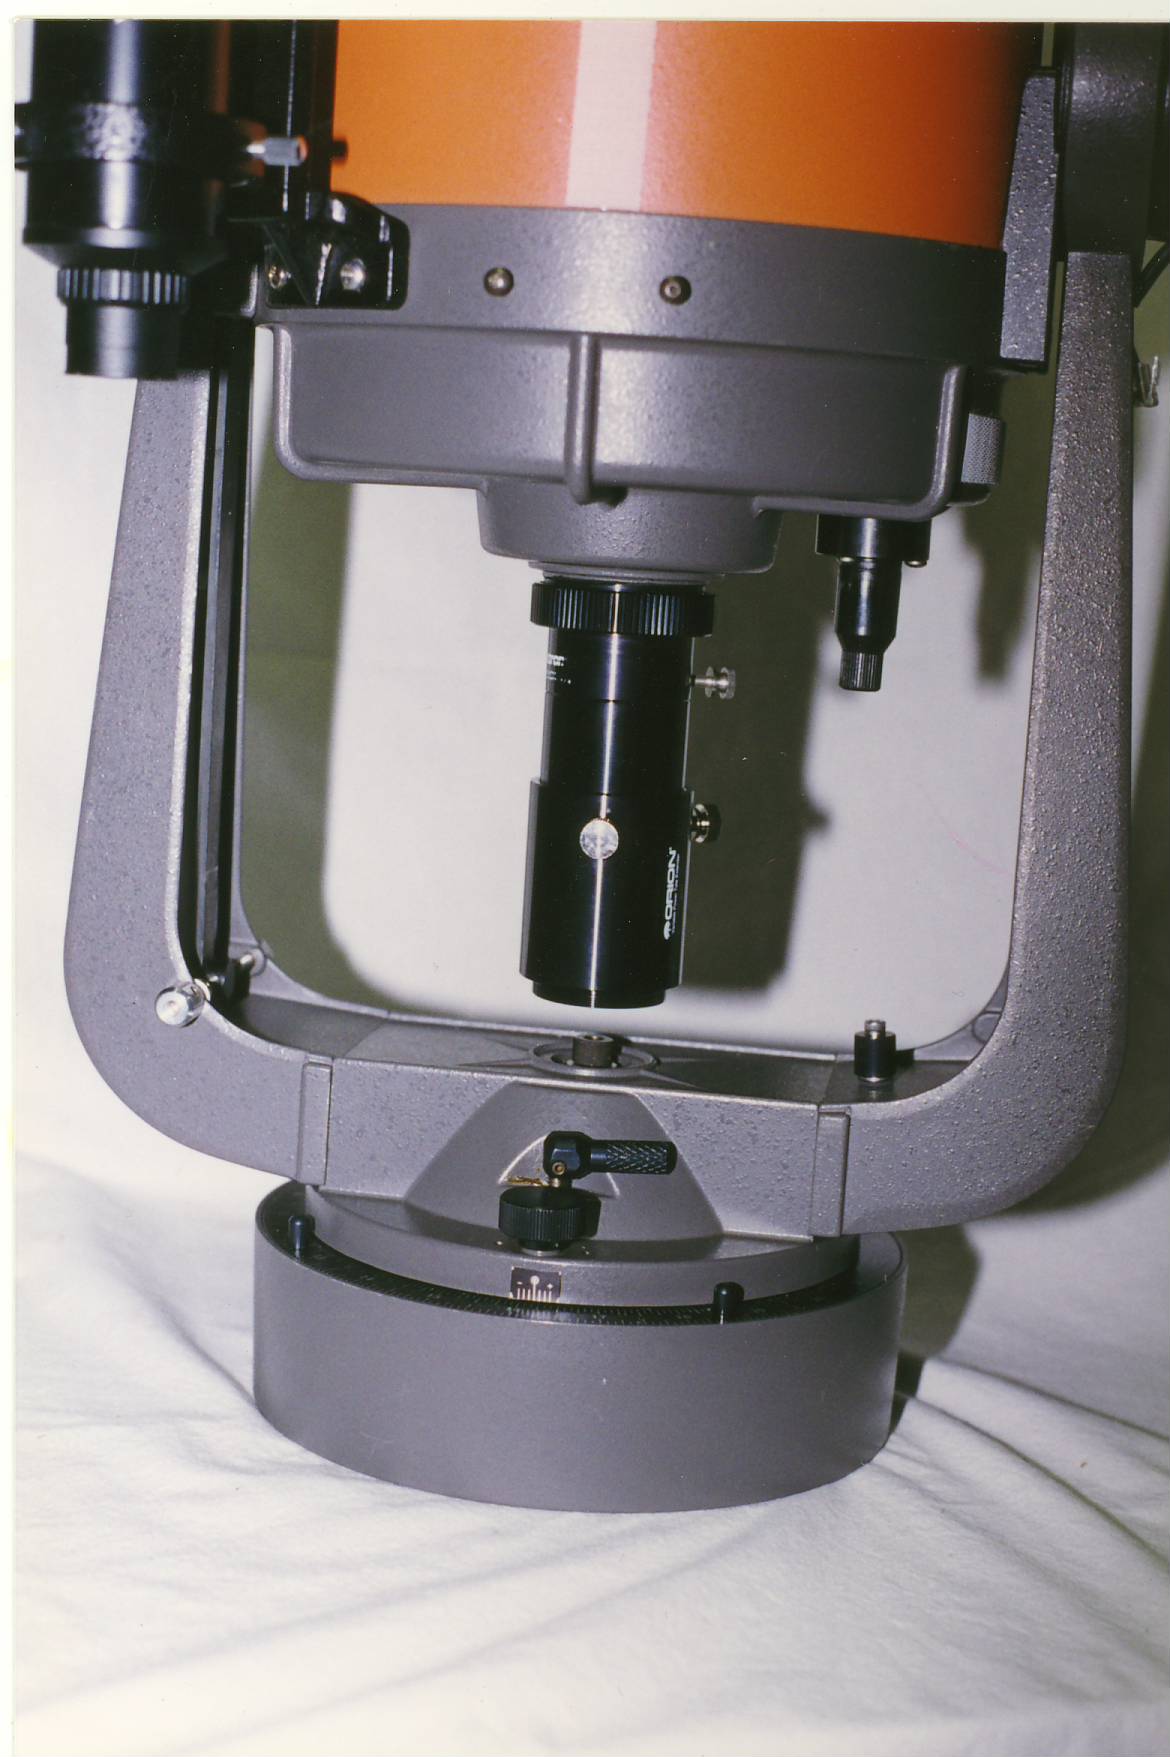
After fumbling with this for part of an afternoon and the early dark hours last weekend, the comic strip incandescent 100 watt lit up in my head. I attached the tele-extender (without an eyepiece) to the rear cell. Then after centering and affixing a paper "hole reinforcer" to the plastic cover of the polar axis at the base of the fork and pointing the open end of the tele-extender toward the polar axis cover, I looked down through the corrector plate and made fine adjustments in declination until I had concentric circles of (1) the secondary assembly, (2) the opening of the tele-extender, and (3) the polar axis cover with "hole reinforcer". Now rotating the fork/tube assembly 360 degrees in R.A. should show optical/mechanical coaxiality. If the "reinforcer" should wander about as the fork is rotated, adjustments to the fork arms will be straight forward. There is less than an inch clearance between the end of the tele-extender and the polar axis cover, making preliminary alignment very close.
Now, so that I don't have to do this all over again next time out, I set the declination circles on both sides to 90 degrees.
I hope this helps anyone who has been frustrated with the same problem.
The fork arm adjustment Russell mentioned above can be accomplished by loosening up the 2 bolts that secure the forks to the base plate. You should discover the holes for these bolts are a bit larger than the bolt diameter giving a small amount of adjustment.
The most important thing is that the declination circles be set to 90 degrees when the "wander" of the reinforcing ring is at its smallest.
Here is another technique for aligning the polar and optical axis. This will work just fine out in the field and can be done in a couple minutes. I wrote these up for Celestar users with the wedgepod. For those with a regular wedge, you can make your adjustments there.
Ok... set up the scope and point the fork arms towards Polaris. If you have set up your DEC circle using Russell's instructions, point the scope to 90 deg. DEC. Moving the wedgepod itself and not the scope on its axes, center Polaris in a fairly widefield eyepiece.
If you have not set your DEC setting circle, you can do it at this time by rotating the scope in RA. If Polaris moves out of the field of view or makes a big circle, fuss with the latitude adjustment until Polaris makes the smallest circle you can get. This process will require adjusting the wedge and recentering Polaris with the Dec control. Keep adjusting, recentering and turning the RA axis until Polaris sits still (it probably won't) or makes a very small circle.
The reason Polaris will not stop moving is because your optical and mechanical axes are probably not parallel. If you can get Polaris to make a small circle in the field of view while rotating the scope in RA, you should be ok. Once you get Polaris as stationary as possible, set the DEC axis to 90 degrees. Lock down the DEC circles and you should never have to go through this procedure again.
Once you have your optical alignment set up, it's time to polar align. You can spend all sorts of money on polar alignment scopes and such that work well, but are really not necessary for visual alignment. If you are going to do astrophotography with a portable telescope, the only true method for this is the Drift alignment
Here is my polar alignment procedure. It will give you accurate enough alignment to allow using your setting circles to find objects and will let the scope follow an object for hours.
First thing you will need is a list of the right ascension for the bright stars in the sky for Epoch 2000. This should be easy to find in star atlases and catalogs. You will also need the RA for Polaris (something like 2h31m, but I might be a couple minutes of RA off).
One problem you will encounter is the wedgepod for the Celestar does not have an azimuth adjustment. You have to move the whole wedgepod around to change its azimuth and this makes fine motions more difficult.
Ok, we now have the scope pointed at Polaris, we know the DEC circle is reading a true 90 degrees and we now have Polaris centered. Using normal scope RA and DEC motions, move the scope to a star whose RA is known - one of the bright stars on your list. Let's say it's springtime, so let's use Regulus for this. Center Regulus (RA 10h08m) and set your RA circle to the RA for Regulus.
Now turn the scope in RA until it reads the RA of Polaris (2h31m or whatever) and move the scope in DEC until it reads 89 degrees and a bit more (Polaris is around 89.25 degrees right now). Lock both RA and DEC axis and by moving the wedgepod/tripod and NOT the RA and DEC of the scope, center Polaris.
You are now polar aligned. If you wish to get the adjustment a bit closer, move to another bright star in another part of the sky from Regulus and do the same procedure again: set the RA circle to the RA of that star, move the scope to the RA and DEC of Polaris and center Polaris by moving the wedgepod. Two iterations of this procedure will put you within a few minutes of the North Celestial Pole.
The whole process only takes a couple of minutes once you get used to doing it and is accurate enough that I can usually put an object into the field of view of a 45 minutes field of view eyepiece using the circles.